MONDAY MADE IT! ALPHABET LETTER TRAY!


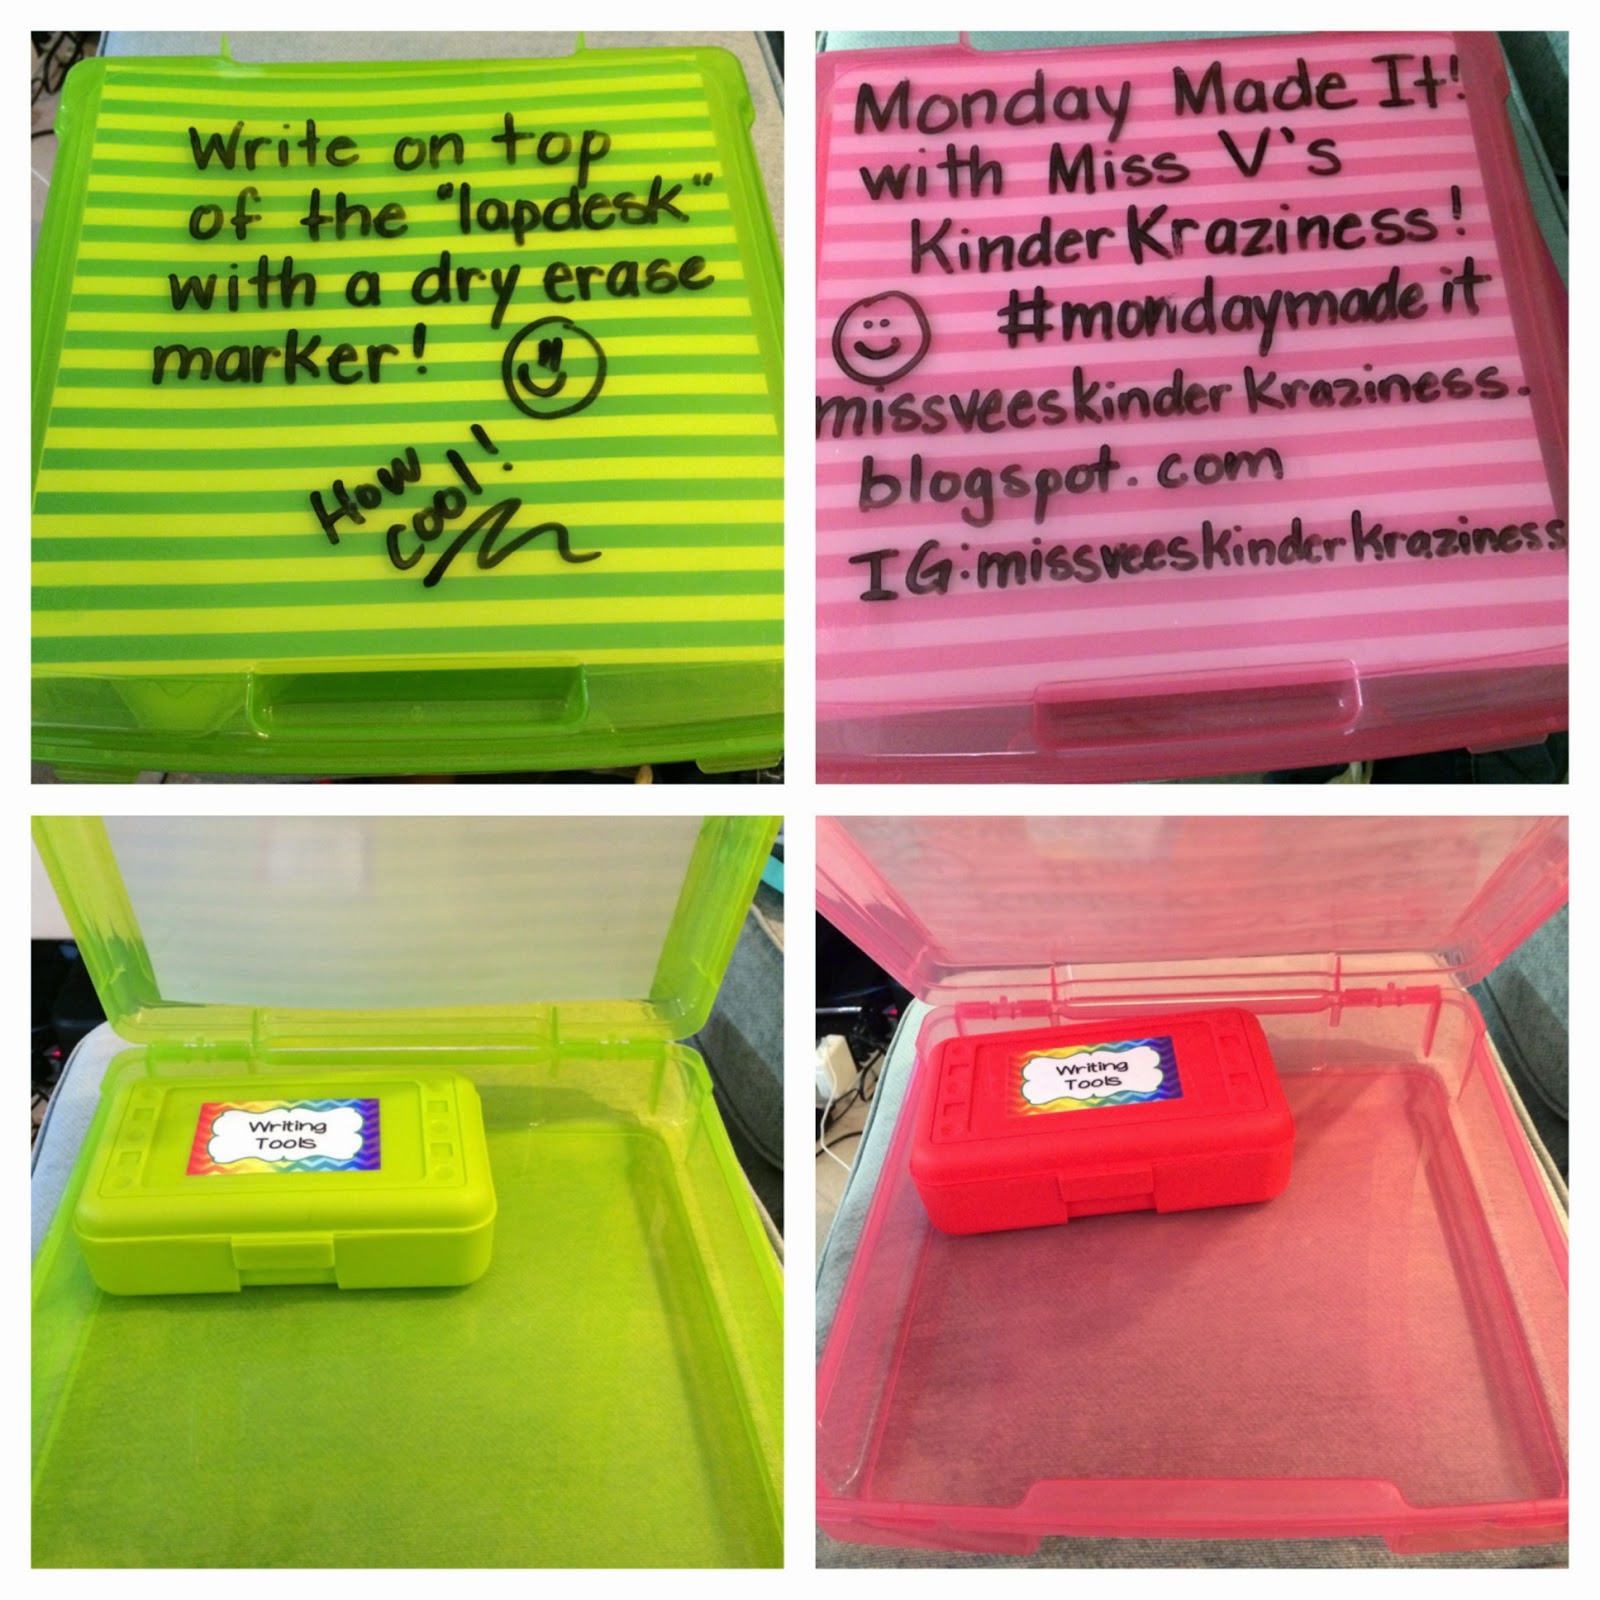
I'm linking up with Tara from 4th Grade Frolics again for #MondayMadeIt !  This is my second MMI ever and since the first one was such a success (lots of great feedback from fabulous followers), I'm going to really try to make something every Monday for the rest of July and August!

This week, my inspiration came from Mr. Greg from The Kindergarten Smorgasboard (click here to see his post).  He blogged about having students match magnetic letters to a cookie tray to practice letter recognition.  LOVED IT!  ADOPTED IT! Made it into my own.  This was going to work out perfectly for my Working with Words center, which is part of the Daily 5 Centers I'm doing this year.

Sooooo, after reading his post, I hopped in my car and drove to The Dollar Tree (which is 3 minutes away with no red lights...it's  good for my class but not for my wallet, hehe) and bought 3 cookie trays.  I already stocked up on letter stickers from Target's Dollar Spot a few weeks ago, so all I needed was spray paint!  Since the letters are nice and bright, I decided to spray paint the cookie trays black so the colors of the letters would POP!  

Since I didn't want to spray paint in my driveway (it was recently repaved) or on the grass in my backyard (not safe for fur babies), I drove to my boyfriends workshop at the airport.  Not only did he offer great suggestions,which you will read about below, but he practically did this Monday Made It! project all on his own (with my guidance & supervision, of course)!

See below for my Step-by-Step Instructions on how to make your own Alphabet Letter Tray!
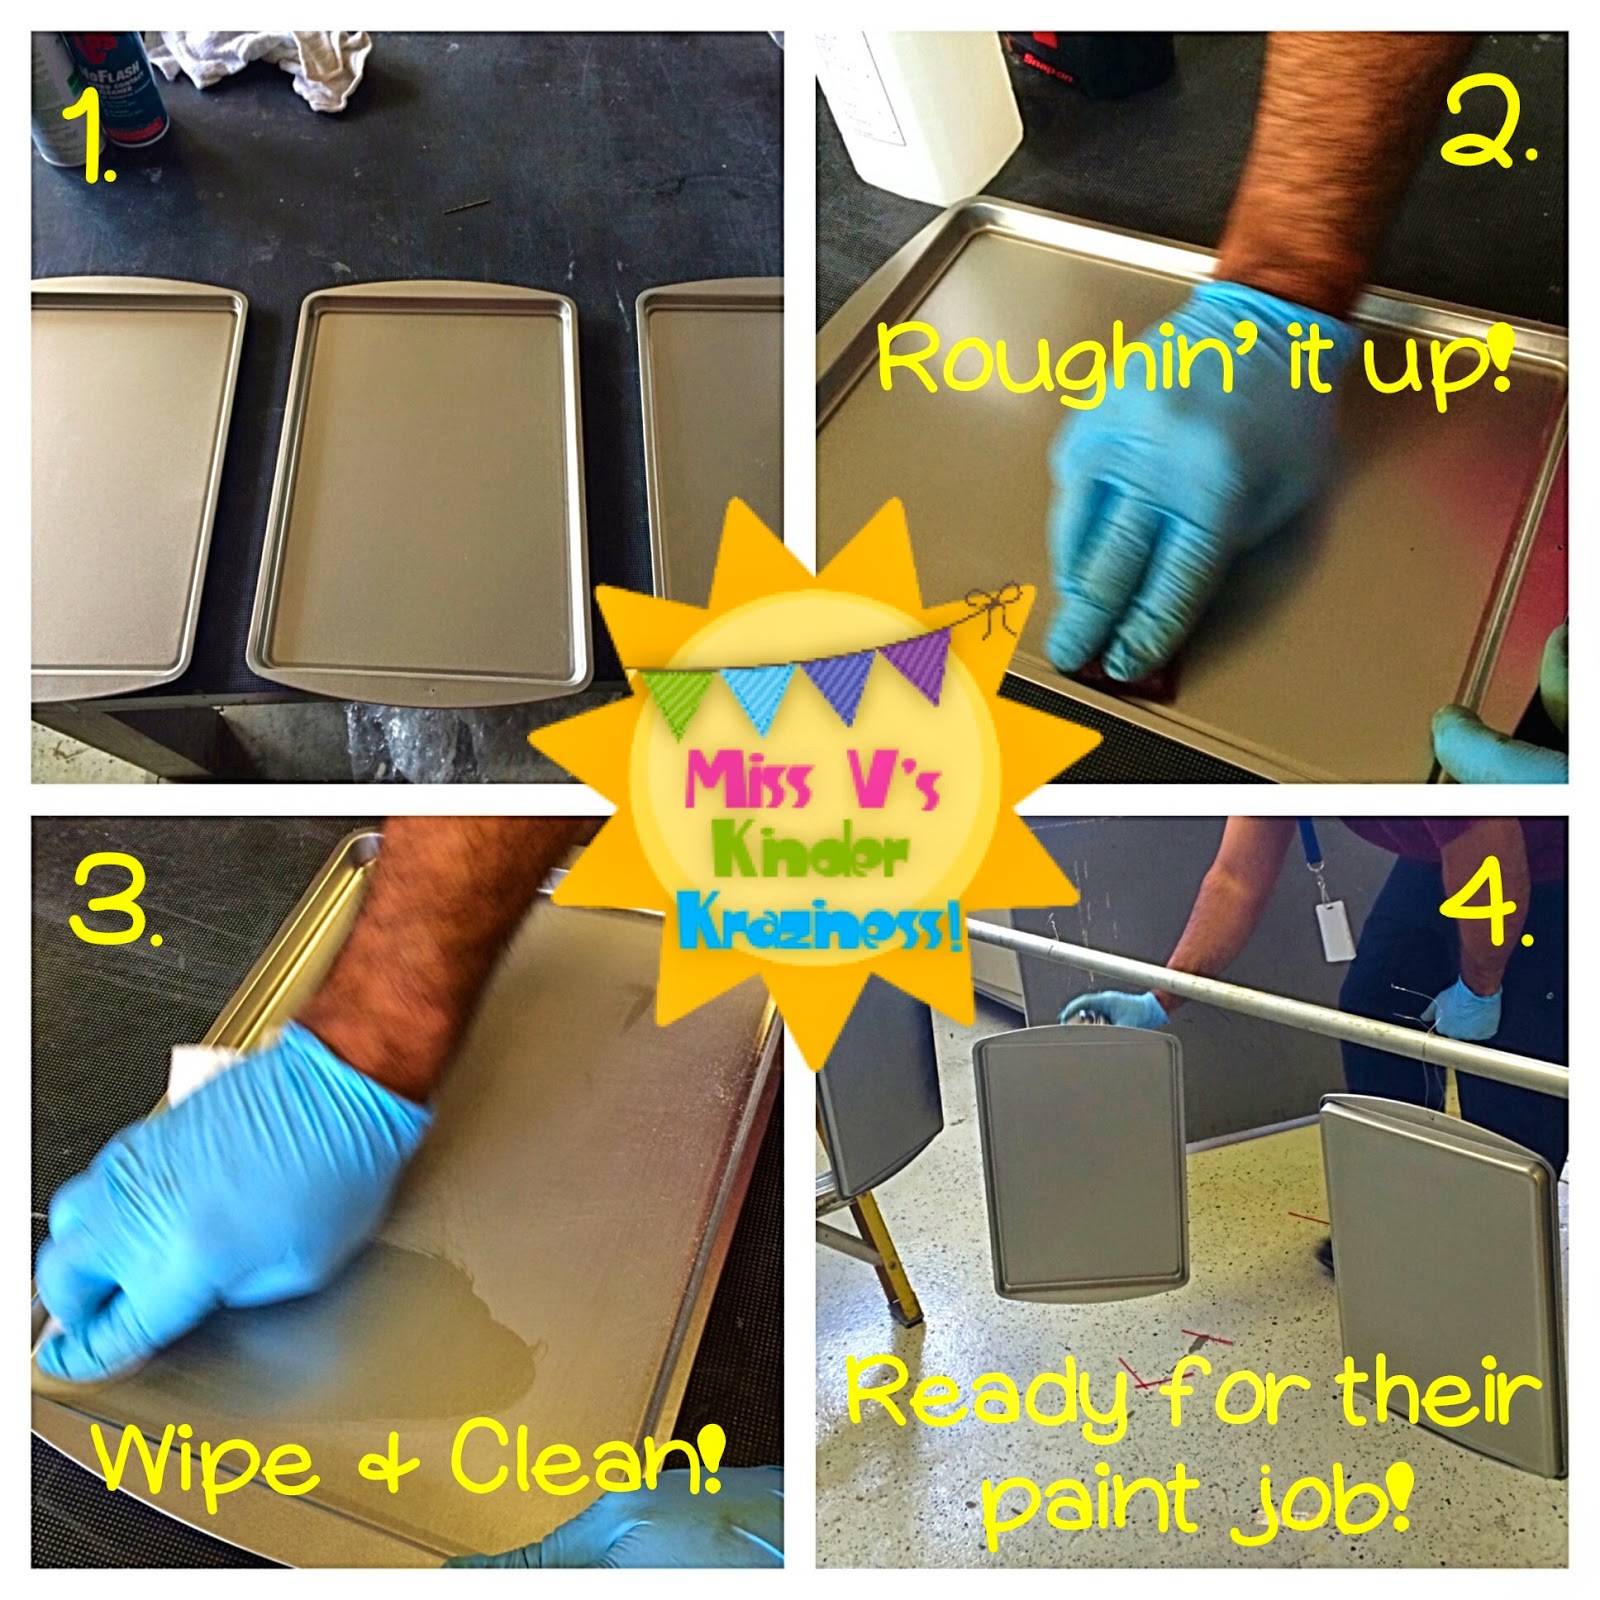
1. Lay out your cookie trays.  Imagine how awesome they will look in a few hours.

2. The BF suggested using a Scotch-Brite pad to rough up the surface (do on both sides).  This will help the spray paint adhere to the tray surface.

3. Wipe & clean both sides with rubbing alcohol and a paper towel.  Spray to paper towel with the rubbing alcohol then wipe.  DO NOT spray the rubbing alcohol directly on the tray.  Also, in case you didn't know, they sell 77% and 90% rubbing alcohol.  Buy the 77% one!

4. The BF made tiny holes on the top of the trays with a screw driver and looped them on thin wire to hang.  This made it easier to spray both sides at the same time, instead of spraying one side, waiting for it to dry, then spraying the other side (and waiting for it to dry some more).  This step is entirely up to you and how you prefer to spray paint things.

*Do you like the pictures so far? I photographed while the BF did all the work. HAHA! Love him :)*
5. Spray paint both sides. 

6. Let dry for about an hour or so.  Paint another coat.  Let dry some more! I let them dry overnight just to make sure! 


7. Use tape to section off the rows.  I'd say about an inch and a half.  The measurement was eyeballed, so  measure at your discretion. ;-)

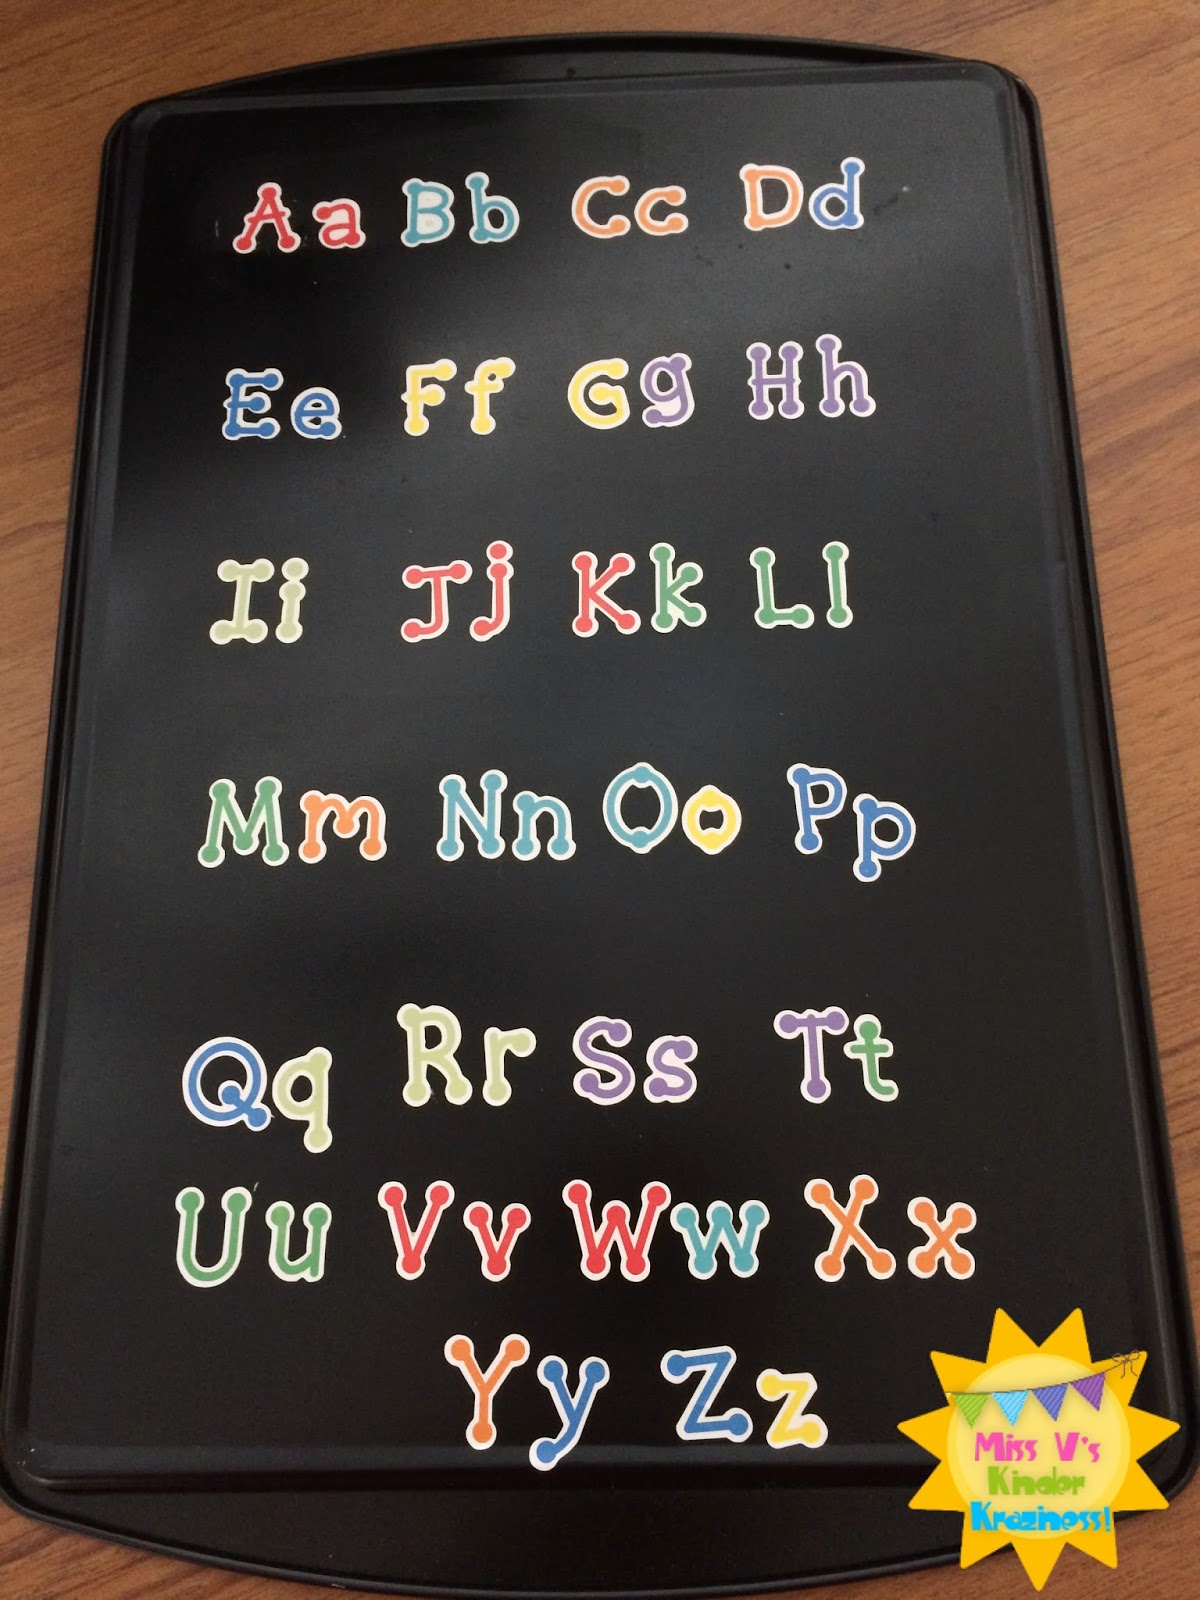
8. Place your letter stickers on the tray and VOILA! 

Isn't it pretty?!?  I can't wait to use it in my classroom!  

I plan on having a small sensory bin filled with these sensory beads from Lakeshore Learning and magnetic letters, and the students will search the bins for the letters and place them on the tray!  One week I plan on having a sensory bin with ONLY uppercase letters, another week ONLY lowercase letters,  then finally all upper & lowercase letters mixed together in one bin.  SO MUCH F-U-N!

Thanks for joining me again folks!  This is just the start of a beautiful friendship.  I wanted to share a photo with all of you, as it sums up exactly how I feel about the social media community among us teachers.  Thank you all for your "gifts".


 Best wishes & kisses,

post signature

P.S. If you have been inspired by my Monday Made It!, please share your version with me!  I'd love to post them on my blog and Instagram.  Don't forget to follow me on both!  

P.S.S.  I've hosting a giveaway on my Instagram!  The 500th follower will receive a "scent"sational prize!  WHAT ARE YOU WAITING FOR?!  The link is in my banner above.

P.S.S.S. Don't worry Bloggers, I'm doing a giveaway on this blog soon! Stay tuned! ;-)
3

What's Happening Wednesday-Dollar Tree Haul!

Hey all!  Just a quick post about my Dollar Tree Haul today!  I honestly blame (and thank!) all of you AMAZING teachers on Instagram for this one.

1.  Clipboards for the Read the Room Center!  Aren't they so pretty and colorful?  I'm keeping the pink one for myself! ;-)

2. Push Light- When I'm meeting with a small group or one-on-one writing conferences with students and don't want to be disturbed by other kids, the light goes on.  It's my "I'm Invisible" light.  I saw this on someones Instagram and read it on their blog.  If this idea was yours, please let me know so I can give you the proper credit!

3. Cocktail Stirrers for Reading Pointers!  Genius! Again, saw this on IG and a blog.  Credit yourself please!  

Annnnnd look what came in today from Groupon!!! EEEEEKK!  


My PINK CHEVRON keyboard cover for my Macbook Pro 13!  LOOOOVE IT!  Don't you?!?

Time for din din now and FROZEN is on!  Happy Wednesday!

post signature
3

My First Monday Made It!

I'm so happy to present you all with my very first MONDAY MADE IT! PORTABLE LAP DESKS!

I hope I do this correctly, and if I missed something, please feel free to let me know!  Thanks Tara from 4th Grade Frolics for hosting #MondayMade It!

Alright, so if some of you suffer from a lack of space in your classroom for centers, like myself, then this is the perfect project for you!  I am starting the Daily 5 in my classroom this year and I went crazy looking to buy a small table for my students to work at for the "Working with Words" center.  While shopping at Michael's one day, I came upon a project idea they had posted of a portable lap desk kids can use in the car.  I thought "What an awesome idea for a portable center for the classroom!"  So here are the supplies you will need:

Top Left: Scrapbook paper container (always on sale at AC Moore & Michael's; I bought these for $4.99)
Top Right: Pencil box (make sure they fit inside the scrapbook paper container before you buy them; these cost .99 cents)
Bottom: Lined scrapbook paper, glue dots, scissors, also clear packing tape (not pictured)

*Teacher Tip: When shopping at any craft store, ask if they offer an additional discount for teachers.  Michael's & AC Moore offers an extra 15% off your purchase when you present your teacher ID or a Union card!  Yay for discounts!

Follow these simple directions to make your own portable lap desk!

1. Laminate the lined scrapbook paper.
2. Use clear packing tape to secure the laminated lined scrapbook paper on the inside lid of the container.  I tried using Gluedots but it wouldn't stick on the container. Booo!  If you need to cut the paper to make it fit, go ahead and do so.  I didn't have to.  It fit perfectly fine.

 It should look like this! 

3. Create a label for the pencil boxes; because the lap desk container will hold different worksheets, the pencil boxes will hold different writing tools: pencils, colored pencils, crayons, markers (?), and dry erase markers.  I created a label and used clear packing tape to stick it on the box, like so:


4. Store the pencil boxes inside the container, along with any other "Working with Words" worksheets/activities/tools.  I will be including some worksheets from the Back to School Center TPT package I won from Ms. Richards's Musings!  The lined scrapbook paper acts as lined paper so when the kids are using the dry erase markers to write on the top of the container, they can practice writing neatly on the lines.  Just make sure you MODEL how to stay in the lines ;-)


Voilá! Portable lap desk!  

Hope you are able to implement this in your classroom!  Feel free to leave any questions, suggestions, or comments in the feedback!  Until next Monday everyone!

Best wishes & kisses,

post signature
8

NEW DESIGN!

HOW AMAZING IS THE NEW BLOG DESIGN?!?! Amazeballs, I know! Thank you SO MUCH to Kimberlee, who runs the affordable and most visually asthetic blog design website EVER Digital Doodle Designs.  Any new bloggers out there, GO TO HER!  She is very prompt and got my design up in less than 3 days.  Incredible!  A special shoutout to Jennifer at Kinderdrama for the recommendation.

There are some other loose ends I need to tie up on my blog pages, but I have a new post up on my *Krazy Hauls & Finds* page.  Check it out!  Don't forget to follow me and tell your friends!

Best wishes & kisses,
post signature
2